If you’ve ever wanted to create your own custom game sprites, retro character assets, or pixel icons for small indie projects, you’ve probably struggled to find a simple, usable tool. I’ve been exactly in your shoes, scrolling through dozens of complicated design programs and overpriced editing software just to make basic sprites.
When I first got into making pixel sprites for personal game mods and small indie builds, I assumed it would be straightforward. I thought any pixel art tool would let me drag, draw, and design clean sprites in minutes. I was so wrong.
I ran into every possible roadblock you can imagine. Some tools had overly complex grid systems that made tiny sprite details impossible to nail down. Others locked transparent background exports behind paywalls, which is basically mandatory for usable game sprites. A few tools even crashed mid-design, erasing hours of hand-drawn pixel work for no reason.
What annoyed me the most was that most tutorials skip the actual beginner process. They jump straight to advanced sprite shading and animation, leaving new creators stuck on the basic setup steps. I wasted so much time guessing grid sizes, color settings, and export formats.
After countless failed attempts, lost files, and low-quality sprite outputs, I finally refined a simple, foolproof system. Today, I’m walking you through exactly how to make sprites with image pixel art maker step by step, using only free, browser-based tools and beginner-friendly techniques I wish I knew starting out.
This is all real hands-on experience, no generic robotic instructions, no sponsored tool hype, just honest guidance that fixes every beginner sprite-making mistake I’ve ever made.
Why Dedicated Pixel Art Makers Beat Regular Editors for Sprite Design
A lot of new creators default to standard photo editors or generic drawing tools to make sprites. I get why—those tools feel familiar and easy to access. But they’re terrible for pixel sprite work, and I learned that the hard way.
Regular drawing software is built for smooth brushes, gradient blending, soft shading, and high-resolution artwork. Game sprites rely on rigid pixel grids, sharp block edges, limited color palettes, and zero anti-aliasing. Those two design styles clash completely.
When I used regular editors for sprites early on, my assets always looked blurry, messy, and unprofessional. The soft brush tools created fuzzy edges, automatic smoothing ruined crisp pixel lines, and I had no way to lock my grid for precise small-scale editing.
A dedicated custom retro game sprite design tool fixes all these issues by default. It’s programmed specifically for pixel constraints. It locks your grid, disables unwanted smoothing, restricts color bleeding, and lets you edit single pixels with pinpoint accuracy.
Sprite making isn’t just drawing small pictures. It’s designing functional game assets that fit strict size and style rules. Generic editors can’t replicate that specialized functionality, no matter how many manual adjustments you make.
Key Features Your Pixel Art Maker Needs for Sprite Creation
Before jumping into the step-by-step process, I want to break down the non-negotiable features every good pixel art maker needs for sprite work. If your tool misses even one of these, your final sprites will feel unpolished or won’t work for actual game use.
First, fully customizable pixel grid sizing. Sprites rely on standard tiny dimensions like 16x16, 32x32, and 64x64. Your tool needs to let you input exact pixel dimensions instead of forcing oversized, generic canvases.
Second, grid lock and single-pixel precision tools. This feature stops you from accidentally dragging misaligned pixels or creating uneven lines. It’s the foundation of clean, consistent retro sprite design.
Third, retro limited color palettes. Classic game sprites use restricted 8-bit and 16-bit color sets. These presets prevent messy, modern color gradients that kill authentic retro sprite aesthetics.
Fourth, transparent pixel sprite export for games. This is make-or-break for functional sprites. Game engines require transparent backgrounds, so any tool that only exports white-background images is useless for actual development.
Fifth, basic sprite editing utilities. Simple fill tools, pixel erasers, color pickers, and mirror tools speed up your workflow drastically. You don’t need fancy filters—just reliable core editing functions for precise tweaks.
Common Beginner Sprite Mistakes I Regret Making Early On
I want to skip the trial and error for you by laying out the mistakes that set me back for months. These are the most frequent issues new creators face when learning how to design sprites with pixel art tools.
The biggest mistake is choosing the wrong canvas size. I used to make oversized 128x128 sprites for basic character assets, which made them look bloated and out of place in retro game builds. Oversized sprites lose that classic compact retro charm instantly.
Another huge error is ignoring color palette limits. Early on, I used full modern color ranges for sprites, and they never matched authentic retro game art. Bright, unregulated colors make sprites look amateur and inconsistent with traditional pixel game styles.
I also used to skip manual pixel cleanup. Auto-tools and quick brush strokes leave stray single pixels and uneven edges. Those tiny flaws might look unnoticeable zoomed out, but they stand out badly in actual game displays.
Lastly, I used to export sprites in JPG format. JPG compression blurs sharp pixel edges and adds fuzzy artifacts. For sprite work, PNG is always the only valid export option, no exceptions.
How to Make Sprites With Image Pixel Art Maker Step by Step (Proven Beginner Workflow)
This is my refined, tested beginner-friendly pixel sprite creation workflow that I now use for every custom sprite I design. It’s slow, intentional, and built to eliminate every beginner error I’ve ever encountered.
Step 1: Launch a Clean, No-Bloat Pixel Art Maker
Start by opening a dedicated image pixel art maker focused purely on pixel design. Avoid multi-purpose art tools packed with filters, video editing, or photo retouching features. Those extra functions clutter your workflow and cause lag during precise sprite editing.
I always choose tools that load instantly, require no signups, and have zero forced pop-ups. Your creative flow shouldn’t get interrupted by login prompts or upgrade ads while you’re designing tiny sprite details.
Step 2: Set Exact Sprite Canvas Dimensions
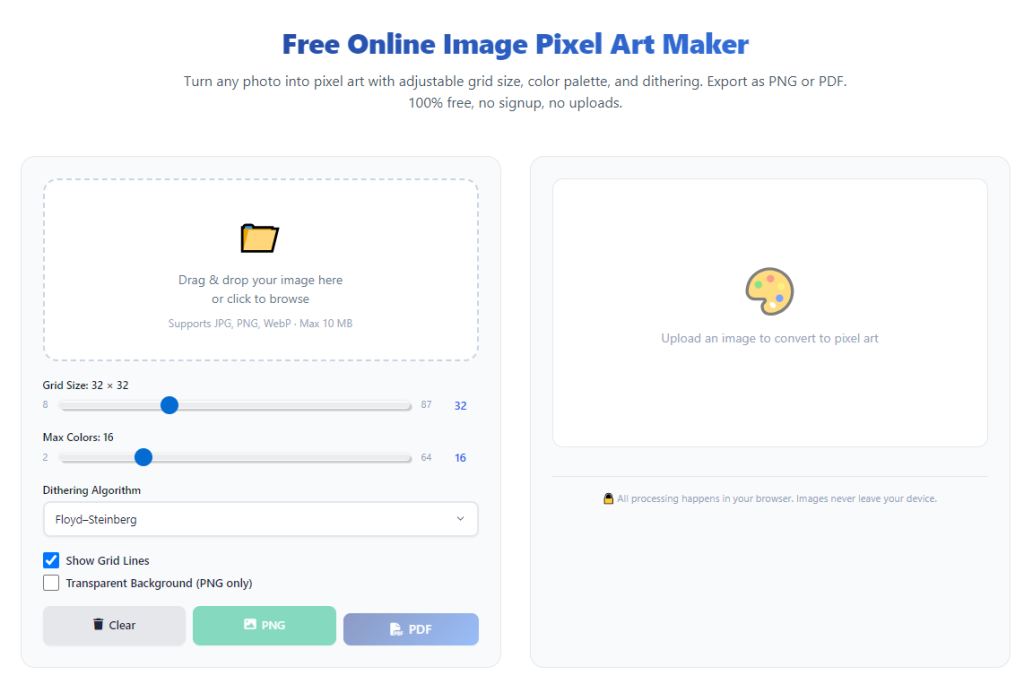
This step defines your entire final asset quality. Before drawing a single pixel, set your canvas to a standard sprite size. For basic player characters and small icons, 32x32 is perfect. For more detailed enemies or items, 64x64 works best.
Never start with a blank oversized canvas and shrink your art later. Resizing ruins pixel sharpness, distorts edges, and creates blurry compression errors. Always design sprites 100% to their final intended size.
Step 3: Enable Grid Lock and Pixel Snap Features
Turn on grid visibility and pixel snap locking immediately. These two settings are what separate professional-looking sprites from messy beginner attempts.
Grid locking ensures every single pixel you place aligns perfectly with your canvas structure. Pixel snap stops your brush from creating half-pixel blurs or misaligned strokes. This simple setup step eliminates 80% of common sprite imperfections.
Step 4: Select a Retro Game Color Palette
Pick a classic 8-bit or 16-bit preset palette to lock your color range. Restricting your colors forces clean, intentional design choices and matches the aesthetic of classic retro video games.
New creators often overuse bright, saturated modern colors. Sticking to vintage palette tones instantly elevates your work and makes your sprites look cohesive and authentic. You can tweak individual hues slightly for custom flair without breaking the retro style.
Step 5: Block In Your Basic Sprite Silhouette
Start simple. Don’t jump straight to shading or tiny details. Use a solid base color to block out your entire sprite silhouette—whether it’s a character, item, platform, or icon.
I used to over-detail sprites first and end up with disjointed, messy designs. Blocking the base shape first helps you maintain balanced proportions and consistent sizing across all your game assets.
Step 6: Add Base Colors and Define Key Features
Once your silhouette is solid, fill in core base colors for skin, clothing, textures, or item materials. Keep things flat at this stage—no shading, no highlights, no subtle blends.
Focus entirely on defining recognizable features. For character sprites, outline faces, limbs, and clothing details. For item sprites, define edges and key visual markers that make the asset easy to identify in-game.
Step 7: Apply Retro Shading and Depth
Now you can add subtle shading to create depth. Use two or three darker tones from your selected palette for shadow layers, and one lighter tone for minimal highlights.
Classic pixel sprite shading is bold and blocky, not soft or gradient-based. Keep your shadow edges sharp and defined. This stays true to retro game design rules and avoids the blurred look of modern digital art.
This stage is where simple pixel art sprite editing tips make all the difference. Less is always more with pixel shading—overdoing it muddles your sprite’s clean retro look.
Step 8: Clean Up Stray Pixels and Uneven Edges
Take two full minutes to scan your entire canvas for errors. Erase stray floating pixels, fix uneven lines, and smooth out jagged edges that break your silhouette shape.
Even one random misplaced pixel can make a sprite look unpolished in a game environment. I skip this step at my own risk every single time I rush a project, and I always end up re-editing later.
Step 9: Preview In-Game Scale and Adjust Details
Zoom out your canvas to actual in-game size. A lot of details that look great zoomed in become muddy or unreadable at full scale.
If small features blur together, thicken key lines or simplify tiny details. Your sprite needs to be recognizable and distinct when displayed at its final small game resolution.
Step 10: Export as Transparent PNG
Finally, export your finished sprite as a high-resolution PNG file with a fully transparent background. Avoid JPG, WebP, or any compressed format here.
PNG preserves every sharp pixel edge and keeps your background transparent for seamless integration into any game engine, mod project, or graphic design build. This final export step ensures you get high-resolution pixel sprite crafting guide level results every time.
Real Use Cases for Custom Pixel Sprites
Once you master this simple workflow, you’ll find so many ways to use your custom sprites. It’s a fun skill for casual creators and serious indie developers alike.
Most beginners start by making custom character sprites for small indie game projects or game mods. You can replace default game assets with your own unique retro designs for a personalized gameplay experience.
Many creators also make pixel item sprites, platform tiles, and UI icons for custom game builds. Consistent hand-made sprites make small game projects feel polished and professional.
Even non-game creators benefit! Custom pixel sprites work perfectly for social media avatars, streaming icons, custom emoji sets, and retro-style graphic overlays for content creation.
Final Thoughts
Learning how to make sprites with image pixel art maker step by step unlocks a totally new creative skill set with zero expensive software or advanced design training required.
Sprite design doesn’t have to be complicated, time-consuming, or frustrating. With the right tool setup, intentional sizing, retro color discipline, and quick manual cleanup, anyone can craft clean, professional-grade pixel sprites from scratch.
Skip the overcomplicated design programs, avoid the generic photo editor mistakes, and stick to this proven beginner workflow. You’ll be creating custom, game-ready retro sprites consistently in no time at all.
After learning the operation method, click the link below to enter the tool page for immediate use.