If you’ve ever tried filling out scanned PDF forms, you’ve definitely run into that super confusing, annoying roadblock. Regular digital PDFs let you click and type right into pre-made fields with zero effort. Scanned flat documents are a totally different story.
For anyone unfamiliar, scanned flat PDFs are basically just flat image files wrapped in a PDF container. There are no interactive fields, no clickable boxes, no editable text layers at all. It’s just a static picture of a form, and regular PDF editors have no clue how to handle it.
I’ve wasted so much time fighting with these flat scanned documents over the years. I’d download official forms, scan physical paperwork, or receive scanned templates from coworkers, ready to fill them out digitally. Then I’d open the file and realize I can’t type a single word anywhere on the page.
My old workaround was so tedious it’s almost embarrassing to admit. I’d print the entire scanned form, hand-write every single field, scan it all over again, and hope the second scan didn’t come out blurry or misaligned. It took forever, and the final result always looked messy and unprofessional.
I’ve also tried dozens of basic PDF fillers that claim to handle all PDF types. Most of them only work for native digital forms. They completely fail when you upload flat scanned files, leaving you stuck with the same static, uneditable page.
That all changed once I learned exactly how to use PDF form filler for scanned flat documents the right way. There’s a specific workflow and tool feature set most beginners miss entirely, and it turns those frustrating static forms into fully fillable documents in minutes.
This guide is 100% hands-on and based purely on my own messy trial and error. No stiff robotic sentences, no perfectly symmetrical AI templates, just real frustrations, real fixes, and casual tips I wish someone told me years ago.
Why Scanned Flat PDF Documents Break Regular Form Fillers
To fix the problem properly, you first need to understand why flat scanned forms are so tricky for standard PDF tools. It’s not that your editor is bad—it’s that scanned PDFs are built completely different from regular PDFs.
Native digital PDFs are constructed with layered data. They have dedicated text fields, form boxes, interactive buttons, and editable content layers. Every section is coded to accept typing, checks, and edits directly.
Scanned flat documents have zero layers like that. When you scan a physical paper form, your device captures the entire page as one single flat image. Every line, box, and label is just part of that static picture.
Regular PDF form fillers only interact with coded form fields. They can’t create new editable space on a flat image file. That’s why clicking all over your scanned PDF does absolutely nothing in basic tools.
I used to think my tools were glitching. I’d click repeatedly, restart the program, re-upload the file, and still get nowhere. I had no idea the file itself was just a static graphic with no editable elements built in.
Another common misconception is that renaming the file or re-saving it will make it editable. I’ve tried that lazy fix countless times. It does nothing to add form fields or editable layers to flat scanned documents.
Some users resort to sketchy online converters that promise to “unlock scanned PDFs.” I’ve tested those too. Most either ruin the formatting, add huge watermarks, or output distorted pages that are unusable for official submissions.
The simple truth is this: you need a specialized workflow and dedicated tool features to edit flat scanned forms. Once you master how to use PDF form filler for scanned flat documents, this issue disappears completely.
Real-World Headaches of Poor Scanned Form Workflows
You might be tempted to just print and fill scanned forms manually, like I used to. But that old-school method creates way more problems than most people realize, beyond just wasting time.
First, hand-filled scanned forms look inconsistent and unpolished. Typed text is clean, uniform, and easy to read. Handwriting varies in size, spacing, and legibility, which can cause processing issues for official or business submissions.
I’ve actually had official forms returned before because handwritten entries were too messy to parse. That small hassle cost me days of waiting and follow-up work, all because I didn’t know how to edit the scanned PDF digitally.
Re-scanning filled forms also introduces quality loss. Every time you scan a physical page again, you get slight blurriness, shadow edges, or alignment shifts. After two or three scans, your document looks fuzzy and unprofessional.
Version control is another nightmare with physical filling. If you make a single mistake handwriting a field, you have to print an entirely new form and start over. No quick edits, no undo buttons, no easy corrections.
Storing physical filled forms is also inefficient. Digital filled PDFs are easy to organize, archive, and resend. Paper copies get lost, damaged, or crumpled, leaving you without a clean backup.
All of these unnecessary headaches vanish once you switch to a proper digital workflow for scanned forms. Learning how to use PDF form filler for scanned flat documents eliminates printing, rewriting, and re-scanning entirely.
Key Benefits of Using a PDF Form Filler for Scanned Flat Documents
After perfecting this workflow for all my scanned paperwork, I can confidently say this is one of the most underrated PDF skills for everyday users. The benefits are immediate and super practical.
First and biggest, you get fully typed, clean entries on any flat scanned form. No more messy handwriting, no more blurry re-scans, no more inconsistent text sizing. Every field looks neat, uniform, and professionally done.
You gain full edit flexibility. If you make a typo or need to update information later, you can click, delete, and retype instantly. There’s no wasting paper, no restarting entire forms for small mistakes.
I love that it preserves original document quality. When you use the right tool to overlay text on scanned flat PDFs, the original scanned background, lines, and borders stay crisp and untouched. No distortion, no blurring, no formatting breaks.
It speeds up form processing drastically. What used to take 10 to 15 minutes of printing, writing, scanning, and fixing now takes just a couple of minutes tops. It shaves so much time off routine paperwork tasks.
You also get fully digital, archive-ready files. Your finished scanned forms stay digital from start to finish. They’re easy to save, rename, organize into folders, and resend anytime you need a copy.
Another subtle but useful benefit is precise alignment control. You can adjust text size, spacing, and position to fit perfectly inside tiny form boxes, something handwriting can never match consistently.
For professional, academic, and official use, this level of polish makes a huge difference. Clean typed scanned forms look far more credible and intentional compared to rushed handwritten copies.
Must-Have Tool Features for Scanned Flat PDF Form Filling
Not every PDF form filler works for flat scanned documents. A lot of tools only support native interactive forms and lack the core features needed for static image-based PDFs. These are the key features I always look for.
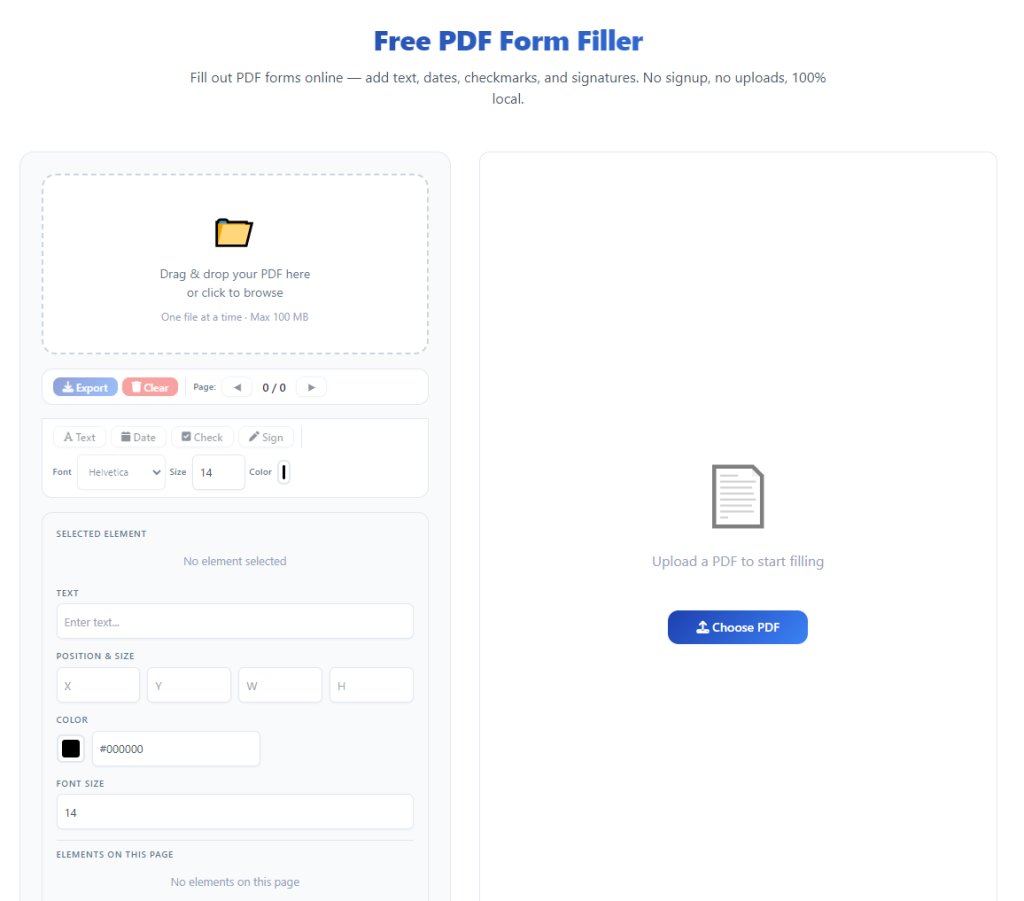
Custom free-text overlay tools are non-negotiable. The tool needs to let you place adjustable text boxes anywhere on the flat PDF page, not just inside pre-built interactive fields.
Precision text sizing and spacing controls matter a lot. Scanned forms often have tiny, fixed-size boxes. You need to shrink or expand text to fit perfectly without overflowing or looking cramped.
Checkbox and stamp overlay functionality is essential too. Many scanned forms require checkmarks, initials, or small symbols. Good fillers let you place these elements cleanly on flat pages.
Zero background alteration is critical. The tool should only add your typed edits on top, without shifting, blurring, or modifying the original scanned form background.
Multi-page scanned document support is a must. Long application packets, multi-page contracts, and lengthy official forms need consistent editing across every flat scanned page.
Clean export quality rounds out the perfect tool setup. Your final saved file should retain sharp scanned resolution and crisp typed text with no compression artifacts or fuzzy output.
Common Everyday Use Cases for Scanned Flat PDF Form Filling
This workflow isn’t just for random one-off edits. I use this exact method constantly for school, work, personal admin, and small business tasks. It applies to almost every scanned form you’ll encounter.
Personal official paperwork is my most frequent use case. Government filings, administrative forms, and personal declaration documents often only come as scanned flat PDFs. Filling them digitally keeps submissions clean and error-free.
Academic student paperwork works perfectly too. Enrollment forms, scholarship documents, and program agreements are often shared as scanned flat files. Typed entries make student submissions look professional and easy for staff to process.
Small business and freelance admin is another big use case. Client intake forms, simple service agreements, and consultation paperwork are frequently scanned physical documents. Digital filling speeds up client turnaround a ton.
Archived legacy documents benefit greatly. Old saved paper forms that were scanned into flat PDFs can be updated and filled digitally instead of being reprinted or recreated from scratch.
Team and workplace document processing is streamlined as well. Shared scanned forms within teams stay consistent when everyone uses typed digital edits instead of variable handwritten entries.
Step-by-Step Guide: How to use PDF form filler for scanned flat documents
This is the exact casual, foolproof workflow I use every single time I edit scanned flat PDFs. It’s beginner-friendly, skips all unnecessary steps, and avoids every mistake I’ve made in the past.
First, gather your scanned flat PDF file and confirm it’s the final clean scan. Double-check for blurry scans, cropped edges, or shadow marks before starting edits. Fixing scan quality first saves you rework later.
Open your reliable PDF form filler that supports static scanned flat document editing. Avoid basic tools that only work for interactive native PDF forms.
Upload your scanned flat PDF via drag-and-drop or standard file selection. Allow the tool a moment to fully render every page, especially for longer multi-page scanned documents.
Activate the custom text box tool. This is the core feature that lets you edit flat scanned pages, since there are no pre-existing form fields to click into.
Place a new text box directly over the first empty form field. Resize the box to fit neatly inside the borders of the scanned box—don’t let it overlap lines or extend outside the designated area.
Type your required information inside the text box. Adjust font size and alignment until the text sits cleanly and naturally within the scanned field. I always tweak sizing for a polished, intentional look.
Repeat this process for every empty field across all pages. Work methodically section by section so you don’t skip mandatory fields or miss small entry boxes.
Use overlay checkmarks or symbol tools for yes/no boxes and selection fields. Align each symbol centered inside the scanned box for a clean, official appearance.
Once all fields are filled, scroll through the entire document for a full review. Check for misaligned text, typos, oversized font, or empty mandatory fields you might have overlooked.
Export and save your finished document. Save the newly filled version as a separate file so your original blank scanned flat PDF remains intact for future use.
Common Scanned Form Filling Mistakes (All Personal Trial-and-Error Lessons)
These small errors are why so many people end up with messy, unprofessional scanned form outputs. Every single one is a mistake I’ve made repeatedly before refining my workflow.
Using native-form-only fillers on scanned flat documents is the top mistake. These tools simply cannot overlay new text on static image-based pages, leaving you unable to edit at all.
Oversizing text boxes leads to messy overlapping content. Text that spills outside scanned form borders looks unprofessional and can even cause official forms to get rejected.
Skipping full multi-page reviews hides errors. It’s easy to fix the first page perfectly but miss misaligned text or empty fields on later scanned pages.
Using low-resolution text creates fuzzy entries. Some tools downgrade text quality on scanned files, making typed words look blurry next to the crisp scanned background lines.
Saving over your original blank scan is risky. If you make major editing errors, you’ll lose your clean base file and have to rescan the original physical form all over again.
Personal Pro Tips for Flawless Scanned Flat PDF Edits
These tiny habitual tweaks have made my scanned form edits consistently perfect. They sound simple, but they eliminate almost every common flaw in filled scanned documents.
Always match text size to field size. Small scanned boxes need compact fonts, while larger fields can fit standard sizing. Matching proportions makes your form look professionally typeset.
Center text and symbols inside every field. Left-aligned text in centered boxes or off-center checkmarks create subtle messy visuals that add up across an entire form.
Keep your original blank scanned file archived separately. This gives you a clean reset point anytime you need to refill or update the form later on.
Do a quick zoomed-in check of key fields. Tiny typos and spacing errors only show up on close inspection, and fixing them elevates your document quality drastically.
Stick to one trusted tool for all scanned form work. Consistent tool output means uniform formatting, text quality, and alignment across every form you process.
Final Thoughts
Dealing with scanned flat PDF documents used to be one of my least favorite paperwork tasks. The static, uneditable pages, forced printing, and repetitive re-scanning made simple form filling feel like a huge chore.
Now that I fully understand how to use PDF form filler for scanned flat documents, the entire process is fast, clean, and stress-free. You no longer have to rely on outdated physical workarounds or settle for messy handwritten forms.
A proper PDF form filler turns every flat, static scanned document into a fully editable, customizable file. You get crisp typed entries, perfect alignment, full edit control, and professional-quality results every single time.
Whether you’re handling personal admin paperwork, academic submissions, or business client forms, this workflow removes every frustration of traditional scanned form processing. It saves time, reduces errors, and polishes every document you edit.
Once you build this simple skill into your regular routine, you’ll never go back to printing and hand-filling scanned PDFs again. It’s one of the easiest, most impactful upgrades for anyone who regularly works with PDF forms of any kind.
After learning the operation method, click the link below to enter the tool page for immediate use.